Anatomy of a Web Quest

With in the past year or two I’ve written a number of web quests for various sites that I have done with my students. The ones I’m probably best known for are the found at Quaver Music Blog ,  This week I thought I would share what I think about when writing them. I have been writing web quests for a while now and found a couple more that were sharable (this weeks post is like a cereal box with a prize at the bottom of the box! :)) 

Usually you find Web quests as research project directions. They guide students around a series of websites to complete activities or research on a certain topic. I write web quests for my elementary school students as a “mission” staying on one website and providing a “to do” list of activities that focus on one concept that they might be working on. Making these web quests take some thought. You have to really know every inch of the site you want the students to go on and be able to get creative with each of the steps. Here’s an outline I use for writing them:
IMG_0002_2

Concept: I try to keep it broad, gives me more options for steps.

Website: Choose a site with a lot of components so you have plenty of options for steps.

Introduction: I sometimes have one and sometimes I don’t depending on the quest. When I do have one it tends to be silly, over the top, and engaging for the students to draw them in to the quest.

Step 1: It is the simplest step out of all 3. This one I will make a simple find the answer or play a quick game. Really think about the level of your students through each step. Not only their level with the concept but also the level they are at with a computer. The inability to use a trackpad very  well can really slow a student’s progress.

Step 2:  I usually tend to make this step some sort of reading or building block to step 3. It sets the bridge from easiest to most difficult steps.

Step 3: This is the test to see if they have understood everything. For me, I usually write this step as directions to create their own music that covers the concept. This is the most time consuming step but usually provides a result the students will be proud of.

After you are done: The last step is just incase you have a few students who  whizz right through everything. Usually a game or a higher level of musical composition difficulty (If you’ve read my Quaver quests I haven’t put these in. I usually write these on the board later in the lesson after I’ve gaged where students are. I don’t want to throw too much at my little guys!)

 I’ve got a bunch of quests in a nice library, have your own and want to share? Post yours in the comments! I’d love to eventually build a little library of them for everyone.

…Want a little extra? Here are 3 never before seen web quests I’ve written for you!!

Dsokids.com -Composers

1.) I was a child star, I started playing and writing music before I turned 6. I wrote  over 600 pieces before I passed away at the age of 35. One of my famous pieces is The Magic Flute..who am I?
2.) I started learning to play the piano from my family before writing music. My most famous work is all about animals..who am I?
3.) I was in the Air Force before studying at Julliard and UCLA. I spent time as a jazz pianist before starting my work as a film composer. Some movies that have my works in the include: Harry Potter, Jaws, Indiana Jones, and Star Wars..who am I?
4.) Lets go play some Baseball! Join some of your favorite composers in a game of Beethoven’s Baseball!
Incredibox.com
Music does not always have to include instruments you know. Did you know your voice is an instrument too? Some songs only have voices in them, we like to call those songs Accapella
1.) Watch the video of the Accapella group Straight No Chaser . How many different voices do you hear? Do they all sound different?
2.)  Build a song without the main melodies in pink and purple. With just the building blocks playing is it still a song? Can you compose a beat that you could sing with that?
3.) Now it’s time to really build your group and get going. Use any of the dudes you want and share with Miss Dwinal afterward, can you beatbox alongwith these gentlemen?
Quavermusic.com

0

    Debussy, Vivaldi, and Beethoven decided to throw a party while the shop was closed last night, those rascals! Now they have disappeared from their posts and are hiding some where in Quaver’s world. Can you help find them?

1.) Debussy‘s piano teacher thought he was a genius when it came to playing piano, while in school he failed many piano tests but when he switched his focus Debussy found he excelled at composition. Where would Debussy be hiding where he could compose at the piano? When you find it help him write 2 measures to start of his next masterpiece!
2.) Vivaldi is quite a character, his personality most certainly reflected in his music with so much contrast . Where can you go to learn more about him and his music? He must be hiding back in his own time! Find him and read more about his wacky personality in his book!
3.) We all know Beethoven lost his hearing when he got older, my hunch is he is trying to retrain those ears. Where will you find him? Go there and play some of the games with poor deaf Beethoven.
4.) Wow, you found all three of our friends! Reward yourself with a hidden composer slide puzzle in the shop.

Christmas Joy

After a week of two hours delays, sugared up children, and assemblies. I sit here with a smile, a heating pad, and a burrito the size of my head. It’s a great feeling to be done for a few days, get a break, and enjoy the holidays. Today I thought I would share videos off of my ever growing YouTube playlist that I have used with my holiday themed lessons this week.

Muppet Carols– I like to play quick games of, Guess that Carol! and have short sing-a-longs with these videos to teach my students the classics that they should know if they celebrate Christmas! and c’mon..IT’S THE MUPPETS!!

Carol of the Bells

Joy to the World

Twelve Days of Christmas (With John Denver)

Movement Break-  I love to dance in class and lately I’ve turned to YouTube to teach the students and I more dances, this video is from Just Dances Kids 2 and is a great dance to the tune of Jingle Bells.

Jingle Bells Dance Break

Shake Break – Have a class of sugared up kids that just cannot sit still? Try this shake break before moving on with the lesson!

Nutcracker- Teaching your students about the Nutcracker? Check out this video, it is a great example from the Dance of the Sugar Plum Fairies.

Dance of the Sugar Plum Fairies 

Happy Holidays!

My Sister and I dressed up for the last day before holiday break!

My Sister and I dressed up for the last day before holiday break!

Frosty the Snowman Center

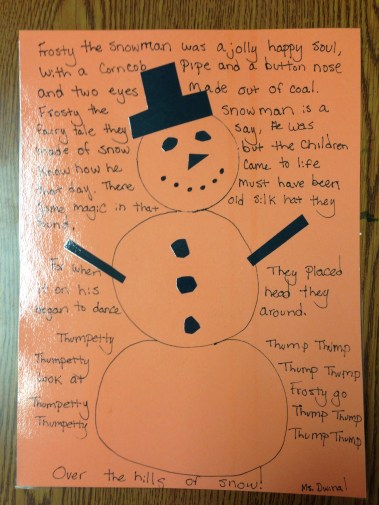
It has been crazy with introducing centers to my new 3rd graders and reminding my 4th and 5th how they go. This week has been some old favorites and a couple new favorites including this lovely Frosty the Snowman craft.

Frosty

           This craft is easy enough to complete in 15 minutes. I have all of the materials out and ready for them to use.

Materials:

  • Construction Paper
  • Coloring supplies
  • Scissors
  • Glue
  • Snowball stencils (Cutout from construction paper and labeled)

I came up with this center because I realized the sad truth..not many of my students knew all of the lyrics to Frosty the Snowman.

Here’s what was written on their instruction card:

1.) Pick a piece of paper, whichever color you like the best.

2.) Trace your snowman on to the paper using the stencils I left out for you

3.) Cut out a hat and some arms. Draw on your face like I drew on mine. Glue them in the right spots.

4.) You can copy the lyrics to Frosty right off of my example! Write yours in the background like mine.

5.) Finishing decorating your snowman anyway you want.

You will eventually acquire a pile of awesome Frosty the Snowmen:

IMG_0066

   This new center was a total hit, some groups asked for me to put my iPad in between them so they could listen to the song while working, some even just started to break out into song. I even caught several students passing by me in the hallway singing it together. Copying the lyrics is a great way to memorize them and making artwork like this with it is not only fun but educational!

IMG_0067

After everyone is done, you could have a hallway like mine! AAHH! Snowmen Invasion!!

Mozilla’s Open Badges

I recently spend time at NHCMTC or the New Hampshire Christa McAullife Technology Conference where I not only had a great first conference presentation ever but also attended some great sessions. One was from a friend of mine, John Martin who is a video game design curriculum guru. For the presentation I attended he talked about Mozilla’s Open Badges program . It is an incentive program for students giving badges for achievements instead of grades just like in the Scouts program.

I really loved this idea especially for music class. Listening to some success stories in the room this program not only works for high achieving students but also for misbehaving students as well. Grades are starting to really become meaningless to a lot of students, a letter or number on a report card isn’t as interesting as a colorful badge they can get in class for doing good work or achieving above and beyond the call of duty and show it off to everyone through the use of the Open Badge Backpack

Imagining the possibilities in the music classroom with this program got me really excited. I have lots of student who not only could use more attention because they love music and want to do more but also for those students who have behavior troubles and need a little extra attention with helping to make better choices. Students could work on badges for mastery of such subjects as basic theory, song composition, recorder black belt status, recording room master, or audio editing genius. Behavior students could work on badges for a certain amount of good work completed, participating, being a good example in class for a whole week, and much more.

There are a few programs out there that teach you how this program works and how to create badges yourself like P2PU Challenge and for those who want a management system to keep track of all your students that work with badges you can check out For All Badges 

I’ll be taking the P2PU challenge when my workload dies down and hope to try this out beginning next year on at least a small group of students, if you are interested in trying this out with me let me know or stay tuned to this blog for more!

Badgemockup

TO THE PHONEBOX! : Challenge accepted, Challenge completed.

This is a story about two cardboard boxes and a woman who went without social media for two weeks. What happened, you ask? A marathon crafting session of epic proportions…

It was a regular Friday afternoon. I had gone without social media for several days now and had checked a lot of work off my to do list deciding it was time to give my brain a nice long break. When I give my brain a break though it usually entails doing a mindless yet productive activity to keep my hands busy. I love to build with my hands, crafting, woodworking, gardening, automotive and electrical work, it makes me happier than a computer ever would. I even have a few years of experience working as in an electrical supply store lighting showroom maintenance and sales person fixing ceiling fans, selling and maintaining light fixtures, etc.  Well, My students had recently issued a dare to me knowing I was at least going to ponder it..it went past the pondering stage and into reality and I’m going to show you how I did it:

That’s right, BOOM CHICA BOOM a Quaver Music Shop Phone Box. I made this one from scratch! Here’s what you need to make one yourself:

-Two large moving boxes from Lowe’s

-Lots of duct tape

-Lots of pictures of composers and a control unit for ultimate time travel.

-A box cutter

-Spray paint

-Construction paper

-4 Foam core boards with the word “Telephone” painted on one side.

-aandd I know this is gonna be hard but grab that lasso and go get yourself a mighty fine black hole to harness it’s awesome time travel power. I’ve got 8!

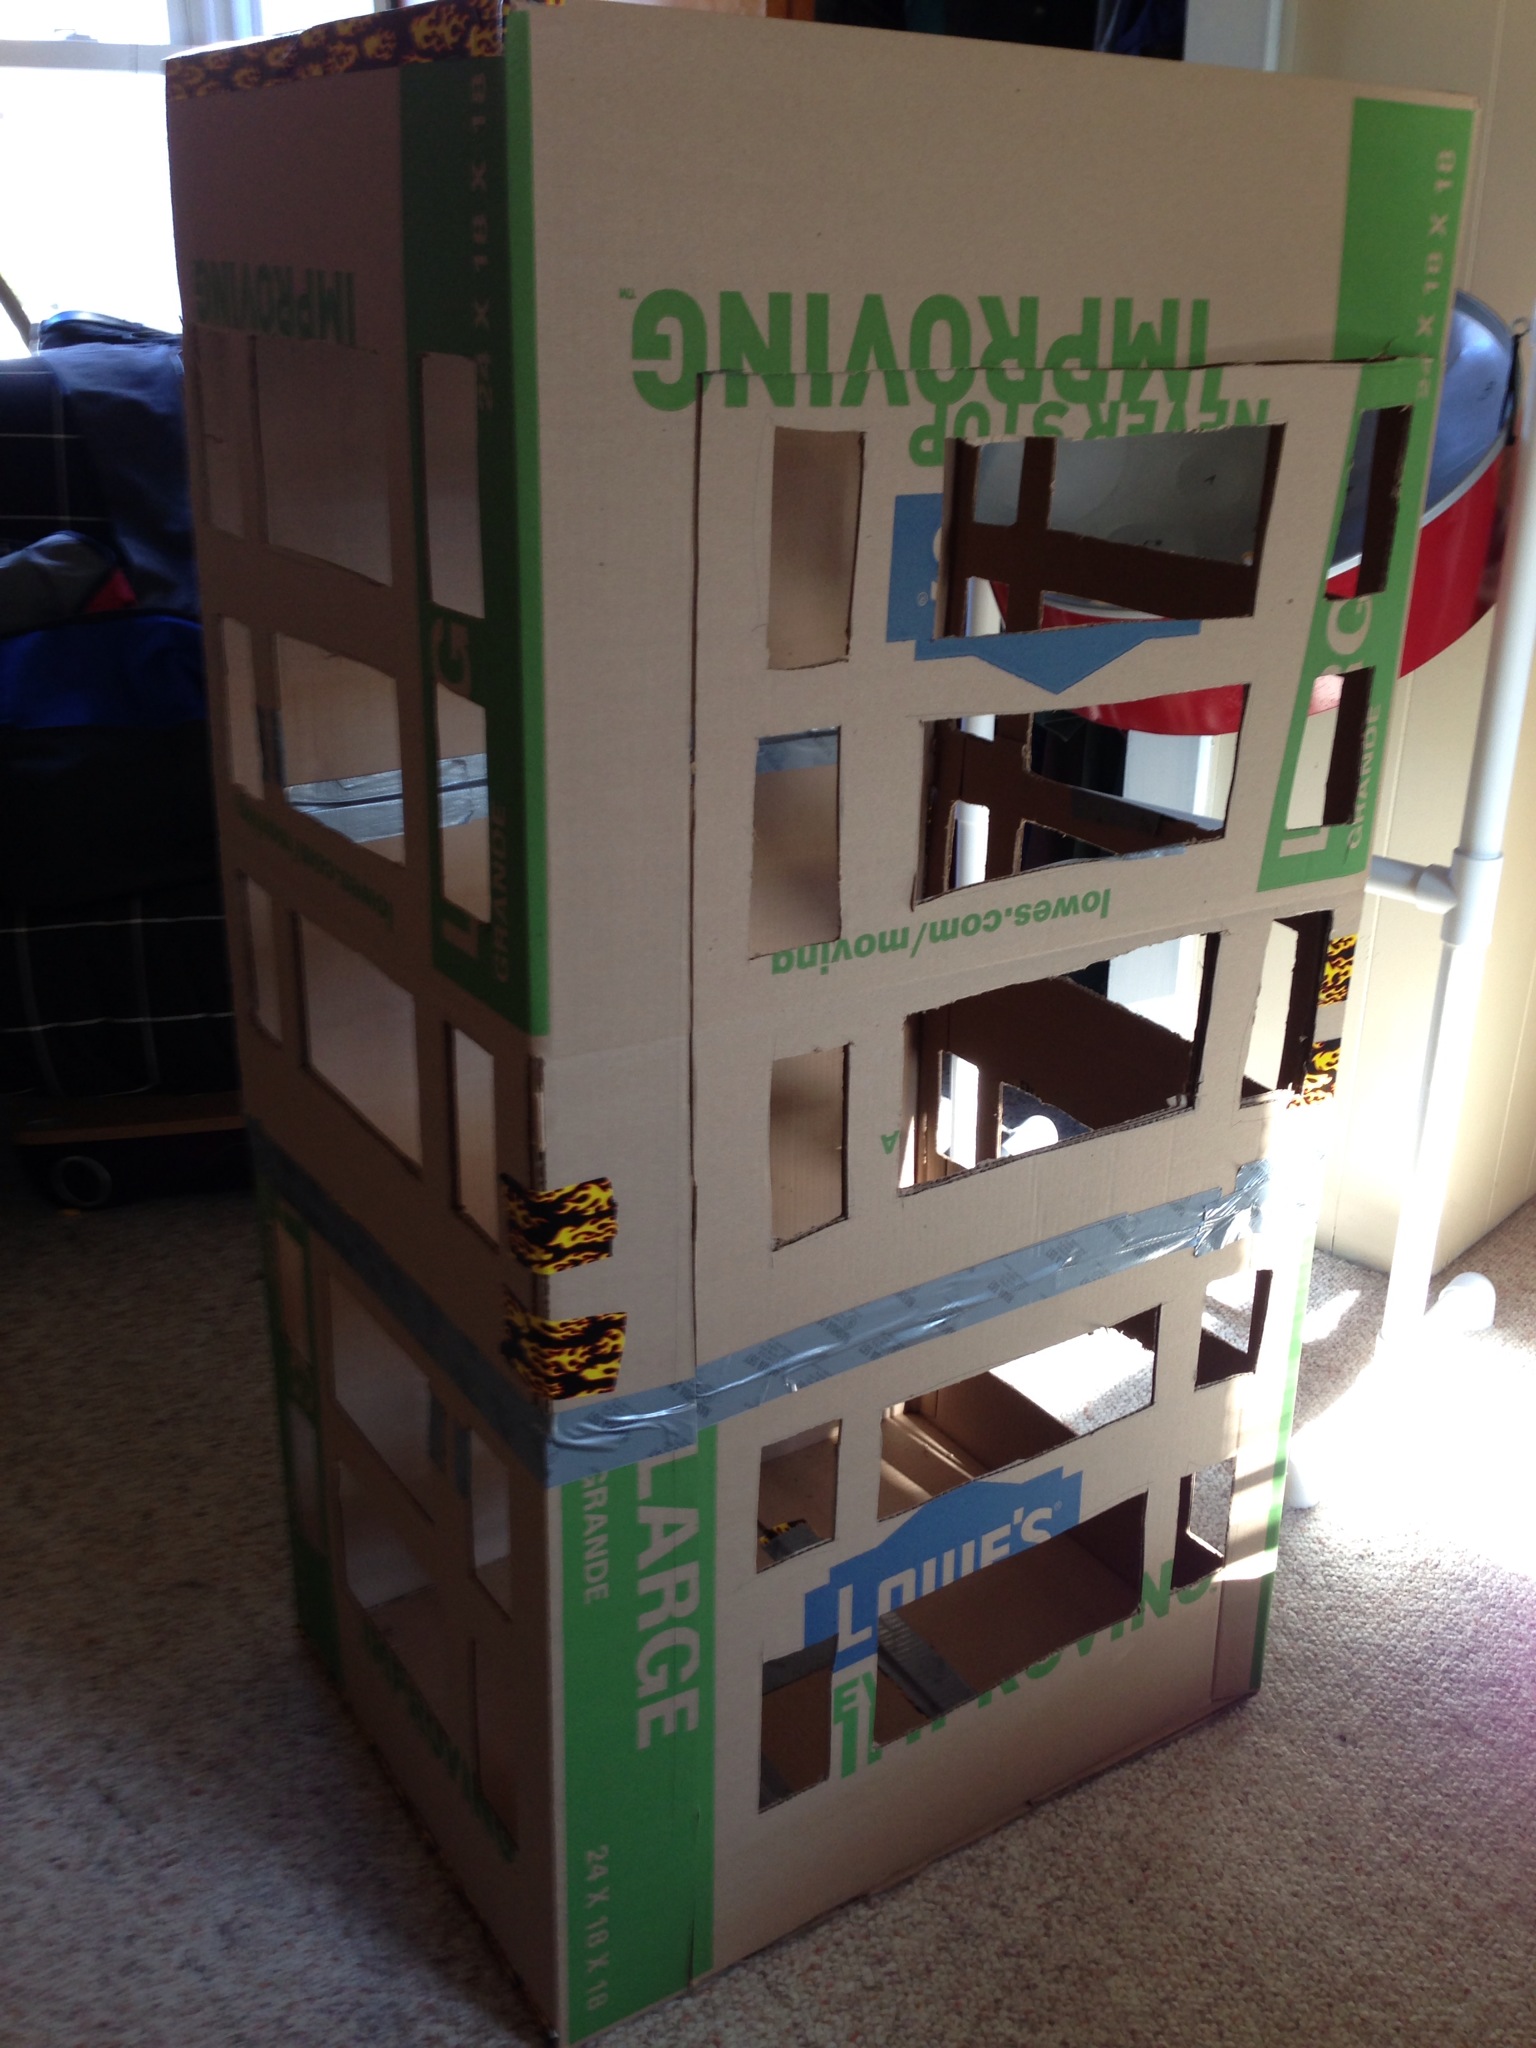
First what you have to do is to duct tape those two boxes together to make your shell.

Make sure to cut a door so you can get in and out of it. BE CAREFUL, one wrong move and you are caught in that box like a mouse in a mouse trap.

Help!I’m stuck!

    Next is the windows, a real phone box has that pattern of windows on three of the sides including the side with the door. My box has 5 rows of windows on each side with a window pattern of small-big-small on each level.

      I used a regular box cutter to cut out each window after I measured them all out. Be VERY careful when using the box cutter though, especially if you’re accident prone!:

PacMan Kisses Make it all Better

      NEXT we inhale some spray paint, JUST kidding..well just don’t sit inside that thing without a respirator..I made that mistake and am still sneezing black! I had 3 cans of red for the outside to get a nice glossy red coat and 1 can of black covered the inside nicely. Do it outside and make sure to wear icky clothes..and a respirator..yup DON’T FORGET THE RESPIRATOR! 

      After I let the box dry for at least a few hours, I grabbed those 4 foam core boards that had Telephone painted on them and glued them around the top outside of the box and clamped them gently so they would not fall.

As those were drying I chose to cut plastic wrap out and glued it to the inside creating that window effect. (You do not have to do this part it will look pretty similar without it.)

   When everything is dry it is time to lasso those black holes and paste them to your ceiling in order to create and cool effect when the students look up so they feel like they are traveling back in time with Quaver. I also lined the border of the pictures with black construction paper to give a neater appearance. After the ceiling is done crawl right in there and start glueing your favorite composers to the back in a nice display. I found all of my pictures here: Composer coloring sheets (I also lined these pictures with black construction paper to give a neater appearance)

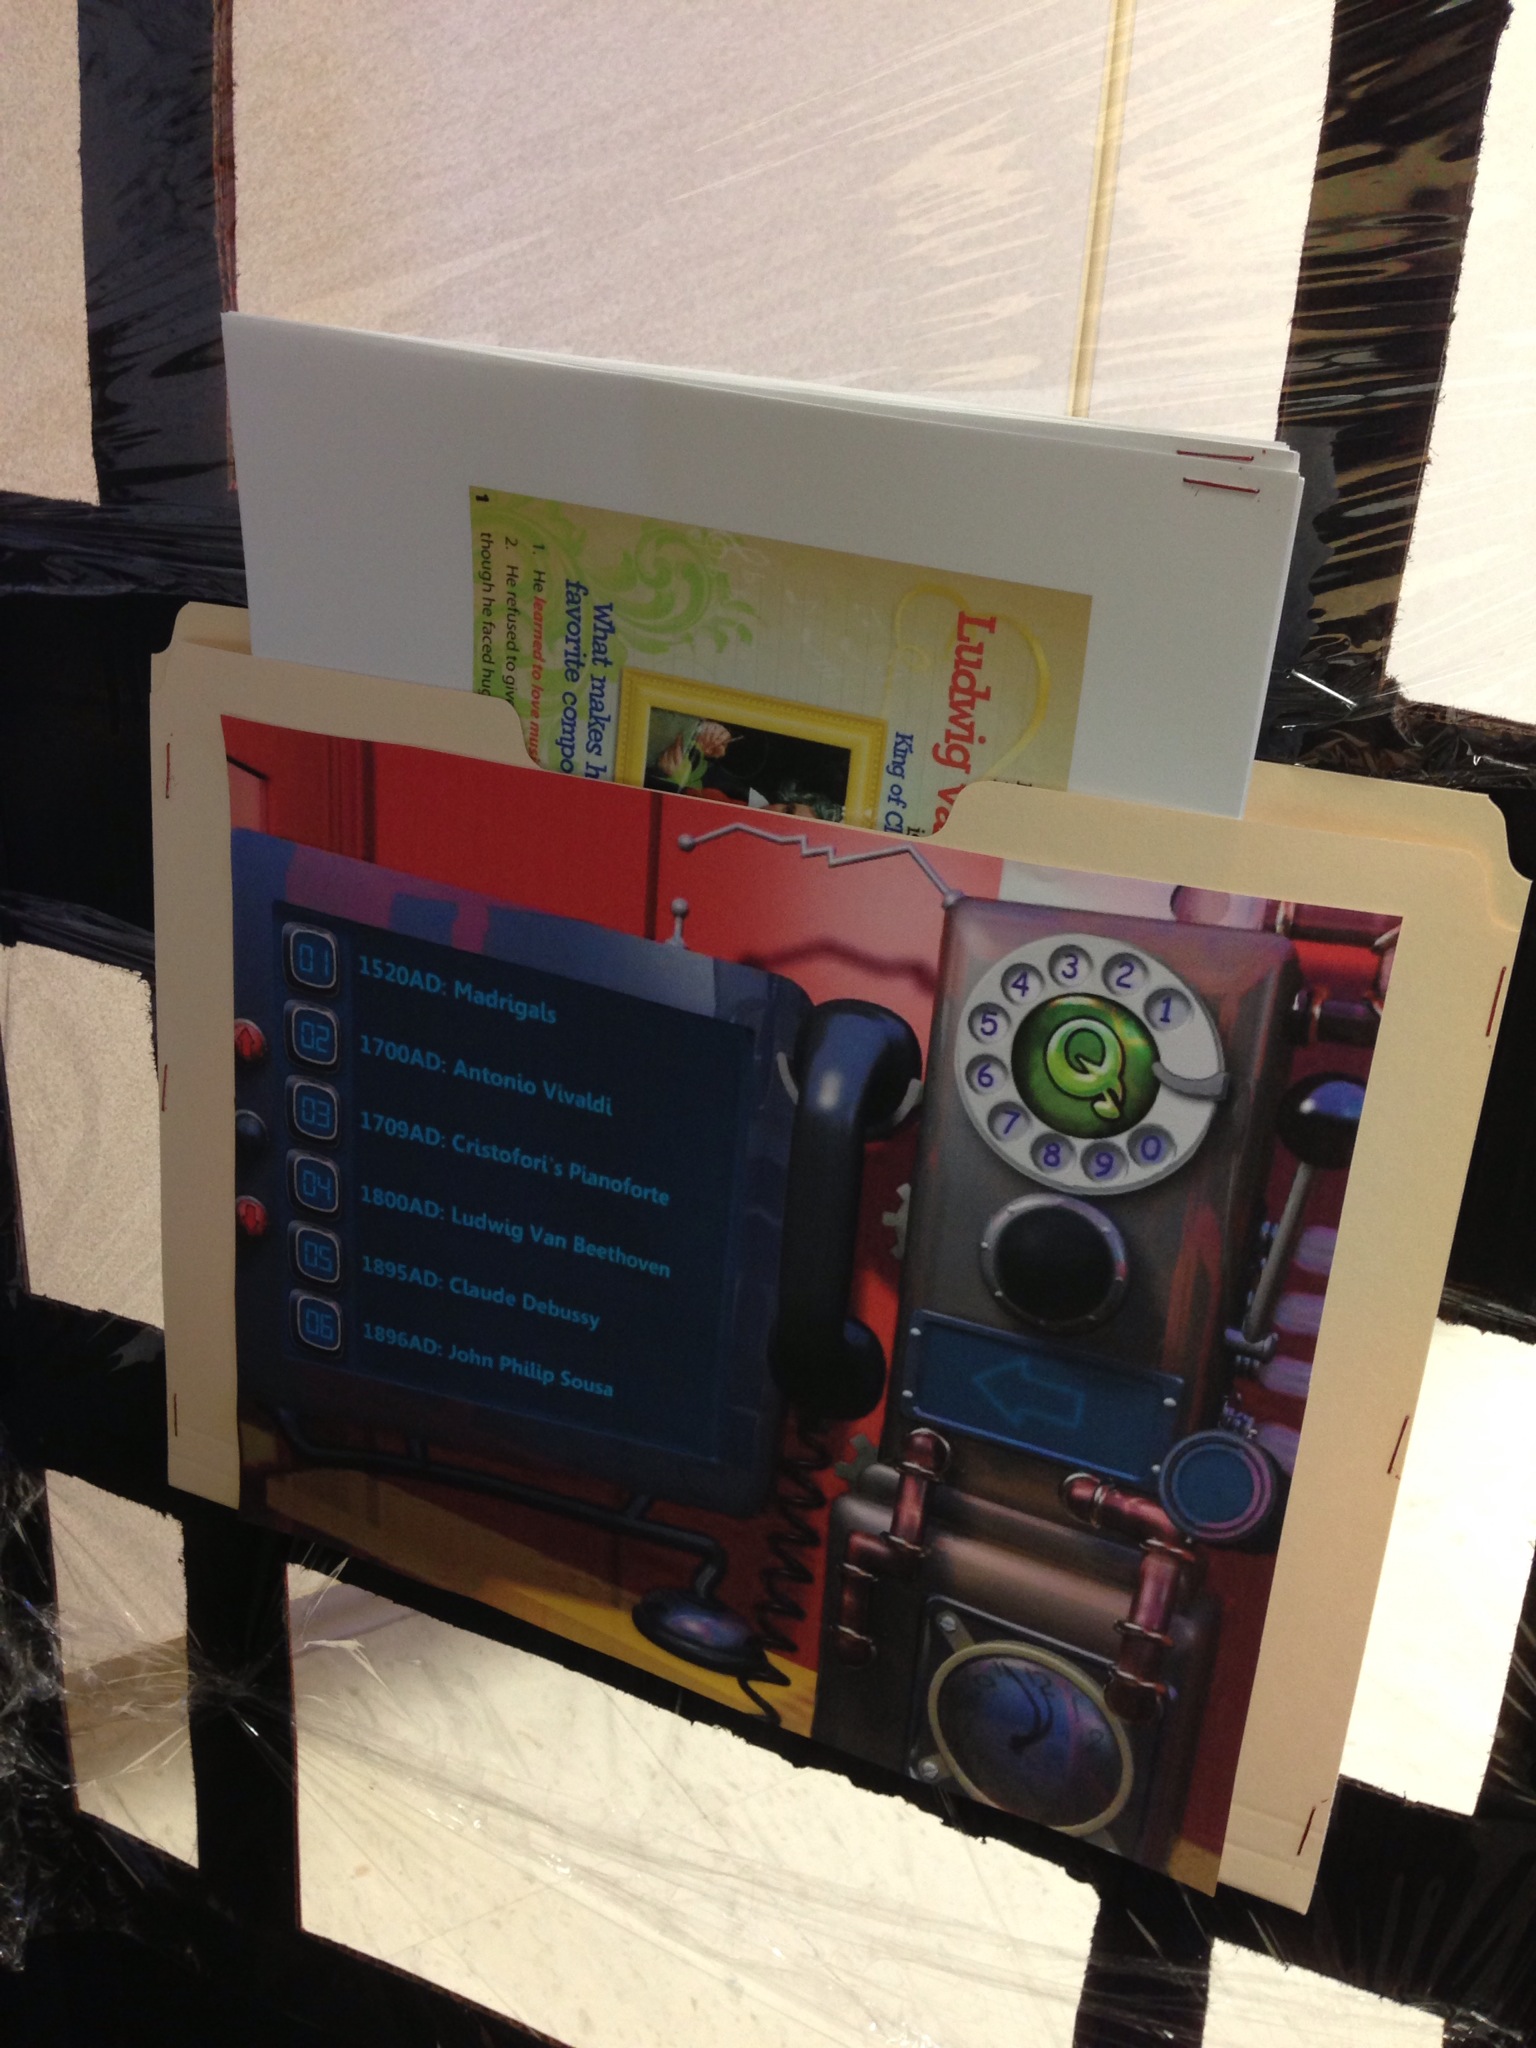
      NOW you’re almost there! I took a screen grab (you can draw your own) of the controls in the phone box on the website which I pasted to a manila folder and duct taped to the inside of the box. In the folder I personally printed out packets of information on the different composers and some things about madrigals. You can put anything in there you wish students to discover.

BOOM CHICA BOOM! YOU ARE DONE!

 *WARNING*

Strange students/sisters might “accidentally” get stuck in there.The eject to the 1500s button is located on the roof OR put it out of reach until you want to have it used.

Happy Crafting!

NHCMTC “Music Tech Made Simple” Presentation.

   It’s only a few days away and I’ve spent weeks going over what I want to do and say. It all goes down at 10:30am est on Tuesday 11/27. Below is the link to my powerpoint and handout for my very FIRST conference presentation all by myself at NHSTE’s Christa McAuliffe Technology Conference. I plan on going through technology found in the normal classroom and showing how it can be used in the music classroom setting giving examples, resources, and suggested activities for most of it. I hope to demonstrate the most important resources from my favorite MPLN heroes and promote the best PLN in the world giving who ever is in my audience a better look on how the music classroom is changing with the help of technology. 

Conference Presentations

     Hopefully I’ve got plenty of caffeine (I’ll gladly accept more!), a friendly and revved up audience, and possibly a few MPLNers cheering me on! I’m so nervous!! 

 Any comments with tips and advice would be great appreciated!

Rhythm Spies

I know I didn’t post on Friday, I’m trying to be strong and not use social media until the Sunday after Thanksgiving just to see if I can do it (So don’t suck me back in! I’m weak!) Feel free to promote this on twitter or facebook if you find this. If you have my email I’m still allowing myself to use that! hehe.  This is a cute activity I’ve been doing with my students as a right before break activity.

Rhythm Code:

  • When students walk into the room have a secret code written on the board and say you will take 5 guesses as soon as you are done attendance. Let them guess anything but don’t give away any answers until the 5 hands have been done.
  • My code looked like this: 

  • I recieved guesses all over the board on this one. From Turkey to dominoes to a beat it was pretty funny. When I got my 5 hands it was then I revealed that the code on the board was “Tah” “TeeTee” “Rest” “Tah”. It was then I got a bunch of “Ms. Dwinal! You’re a good spy!”  To which I replied “Now it’s your turn”
  • The key for building these rhythms is as follows:

                                       No Dots= A Quarter Rest (Whisper ‘rest’ or say nothing) / One Dot= A Quarter Note (Tah) / Two Dots= Two Eighth Notes (TeeTee) / Four Dots= Four Sixteenth Notes (TicaTica)

  • Now, hand out a piece of blank paper and a pencil to each student. Have them fold the paper into 4 sections and then unfold it. They will then draw 4 boxes like above in each of those sections and then using the key they will write a secret rhythm code in each of those 4 sections.
  • When everyone is complete students will then make their way around the room asking 2-3 people per rhythm to “decode” it by saying the rhythm out loud with all the correct “Tahs” and” Tee Tees”  When someone gets one of their rhythms right they write their name down in that section of the paper. The students can ask 1 person up to two rhythms on their paper before finding another classmate to ask.
  • When everyone is done their papers should look a lot like my example:

Rhythm Spies Example

         The kids get a kick out of trying to write their own “code” and pretending to be spies. They are also practicing their rhythm reading as well! You can use any rhythm counting system you have with this.

Understanding What a Measure is Using Blooms Taxonomy

Today during out district PD day I ended up in a workshop with other elementary specialists on using Blooms taxonomy and special questioning techniques more in our lessons. It was very interesting to look at some of these techniques that I normally don’t think about when lesson planning and try to apply it to what I do in the music classroom. In our Blooms Taxonomy session we thought up a concept in our content area and went through each step one at a time while coming up with activities and key questions to use in our classroom that applied to each area of Blooms Taxonomy. My colleague was all over this activity which got me excited and the both of us created the following for understanding all about measures using the steps of Blooms Taxonomy:

All About Measures

Remembering:   

Activities- Questioning and Discussions

Key Questions- What is a measure? Where does it start and end?

Can you point out where the measure starts and ends?

How many beats are in the measures in front of you?

Understanding: 

Activities: Explaining and Interpreting

Key Questions: Can you count the measures in front of you? How did you get that number?

Applying:   

Activities: Label the first 32 measures of the song in front of you, perform or find an 8 measure song, Compose an 8 measure song

Key Questions: How did you label the measures? How do you identify a measure?

Analyzing:  

Activities: Analyze measures in different meters

Key Questions: How many beats make it up? Can you break it down by note or rest? If we have a song that is 16 measures and each measure has 3 beats, how many beats are in the song total?

Evaluating:    

Activities: Give students a piece of music without a meter and have them identify the meter, give students a worksheet and have them divide beats into measures of 2, 3 and 4.

Key Questions: How would you figure out what meter a piece of music is in?

Creating: 

Activities: Play or compose a short song in a meter of ___(2/4,3/4,4/4)

Key Questions: Can you compose a piece of music in the following meter? How many ways can you create a measure in the following meter?


                  What concepts would you use the steps of Blooms Taxonomy for to come up with lessons and questions?

The End Result

A couple of weeks ago I posted about an upcoming project my students were going to be working on as a cumulative assessment to end their quarter: Silly Rap Rhythms with Quaver. Now that the quarter has ended, the projects are graded, and I have piles of great work and a whole library of new recordings. I chose some of the best worksheets and recordings to share. The student work in this post is from 3rd-5th graders!

Lyrics and rhythm worksheets:

Pie Rocks

Drums Go

Ipods Like Ice Cream

Pancakes

Recordings on Sound Cloud:

Christmas

Drums Go

My Dog Has Fleas

M&M

Chocolate is Good

Music is Our Life

Harry Larry

Lemonade Stand

Diamonds

Muppets

Ice Cream

My wonderful students created these songs from the ground up. I usually focus on the basics of creating rhythms during the first quarter I see them and this was a perfect wrap up for everything. They created the lyrics, they composed the rhythms (We used dot notation as explained in the Quaver Music Rhythm episode), and then they logged into www.quavermusic.com and created a background song for their recording in QGrooves creative using Quaver Music’s new rap loops. After ALL of that they learned how to work a mic and run a recording app on the iPad and recorded on their own in the recording studio.

 It took a while to complete all of this but it was a great time for independent learning and discovery for my students and also great one on one instruction time. The project received wonderful reviews from my students and I can’t wait to do it again at school #2 this quarter!

Why I Put a Recording Space in My Classroom

Some people think of me as crazy (well..most people do), I like to consider it “out of the box thinking”. One recent “crazy” improvement to my classroom has been a recording space for my students.

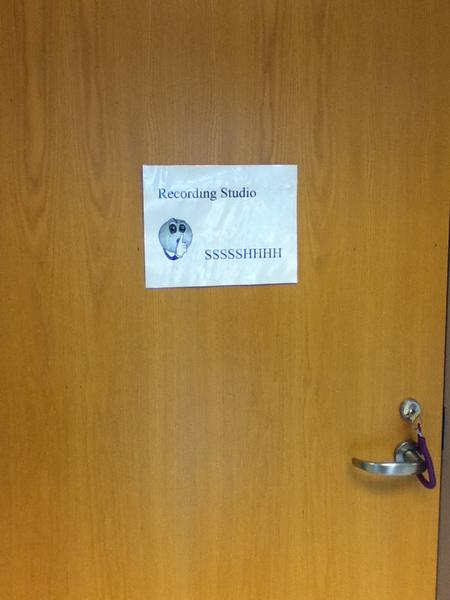
I set this space up for my students to work on their new and improved rhythm projects. It was a space of pure and utter mystery while it remained locked during the beginning stages of their projects ( I just put the sign on the door and hadn’t done anything yet! hehe)

Thinking about durability because of my younger students I kept set up simple. A few chairs, a music stand, a mic stand, an IRig Mic and an Ipad2 with the Wavepad app downloaded to it.

I know it is a closet, but it was perfect to have small groups go in to, to record. The space was small, quiet, and away from normal traffic where they could record quietly. Before students were even allowed to sign up they had to ask themselves the question “Am I ready?” Ready meant:

  •             I have practiced
  •             I have completed the requirements to be ready to record.
  •             I am in control, focused, and ready to record at this very second.

Once they could say yes to all 3 of the above I began to call them in by group going down the signup list one by one. They had to bring in all of their required materials, I showed them how to record, then I let them know to exit as soon as they were finished so we could know the next group could enter. As with any class, some students were faster than others and some were caught red handed goofing off. I didn’t send them in there without rules and procedures to follow though. Posted on the wall were rules made up by each class which usually were centered around:

  • Do not touch the things on the shelves
  • Do not touch the microphone
  • Use the Ipad with respect
  • Work Together
  • Stay QUIET in and out of the studio except for when performing!

The Wavepad app was the easiest way of recording I could find. I showed my students how to use it, asked each group to label their songs with all of the first names of their groups (I can tell who is with who) and after that it was Red Record Button–>Stop Button–>File–>Save. After that they were done and could exit the room!

So why did I give my students this new place? It not only promotes excitement towards doing their best on the projects in order to have a good recording. It also; let’s them feel more trusted and independent in class, gets them using technology gaining skills for later on in life, gives them insight to what some of their favorite music artists go through when making a song,  and is an exciting experience they might remember for the better part of their school career.